Secrets of Fixing an Impossible Metal Clay Faux Pas by Holly Gage
- Holly Gage
- May 17, 2022
- 7 min read
I'm sure many of my jewelry peers and student's who fabricate with sheet metal or sculpt jewelry and other objects from Silver Metal Clay will relate to the ups and downs of studio life. The days where you are in the ultimate creative zone, and other days where Murphy's Law itself is tipping your hand at your jewelry bench. You win some, and then others make you want to pull your hair out. This is the tale of two hand-sculpted perfume bottles that took two different paths to completion. I'll start with the upside of my journey before I tell you about how Murphy put an evil hex on my kiln, overfiring and causing mischief every step of the way on the second perfume bottle. I have many lessons to share about combining metal clay and metalsmith skills with fixing a project gone south. (And I'm not talking about the flight across the studio it almost took to meet its ultimate demise.)
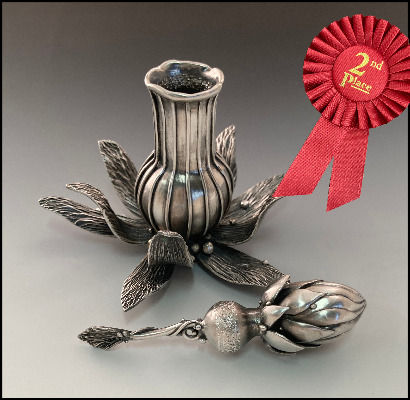
Last week, I received the news I had won 2nd Place for my "Floral Perfume Bottle" in the IPBA Perfume Bottle Design Competition. I was so excited as I am a perfume bottle collector myself. The International Perfume Bottle Association is the largest worldwide organization of collectors, dealers, historians, appraisers, and specialists in perfume bottles. The icing on the cake was when a collector purchased the bottle. It felt like validation, especially after my prior project was a near failure. Inspiration for the 3" x 3" hand-sculpted, sterling perfume bottle with carved leaves and bud dauber are frequent trips to arboretums. I lag behind others in taking pictures from every angle to study the sculptural quality of the undulating petals. It is also the inspiration for the Nefertem Perfume Bottle Classes I teach.

Prior to making the floral scent bottle, I made the “Gothic Raven’s Perfume Bottle" — the Faux Pas of the century. Pictured is the finished scent bottle, but it took quite the journey to get here. The hollow formed Metal Clay structure required precision measuring and multi-levels of dry-to-dry construction.

I hand carved many elements and even tried some new texturing techniques with various burs and my Foredom® Mini Portable, an excellent tool for speed control. I was humming along, and things were actually going pretty smoothly. I was having fun!
I made it all the way through the greenware stage with no breakage. Not many of my projects take a straight line to the finish because... well... I’m a klutz. I accept things will break from time to time with the attitude; I’m just going to have to fix it. I can even avoid the cursing.
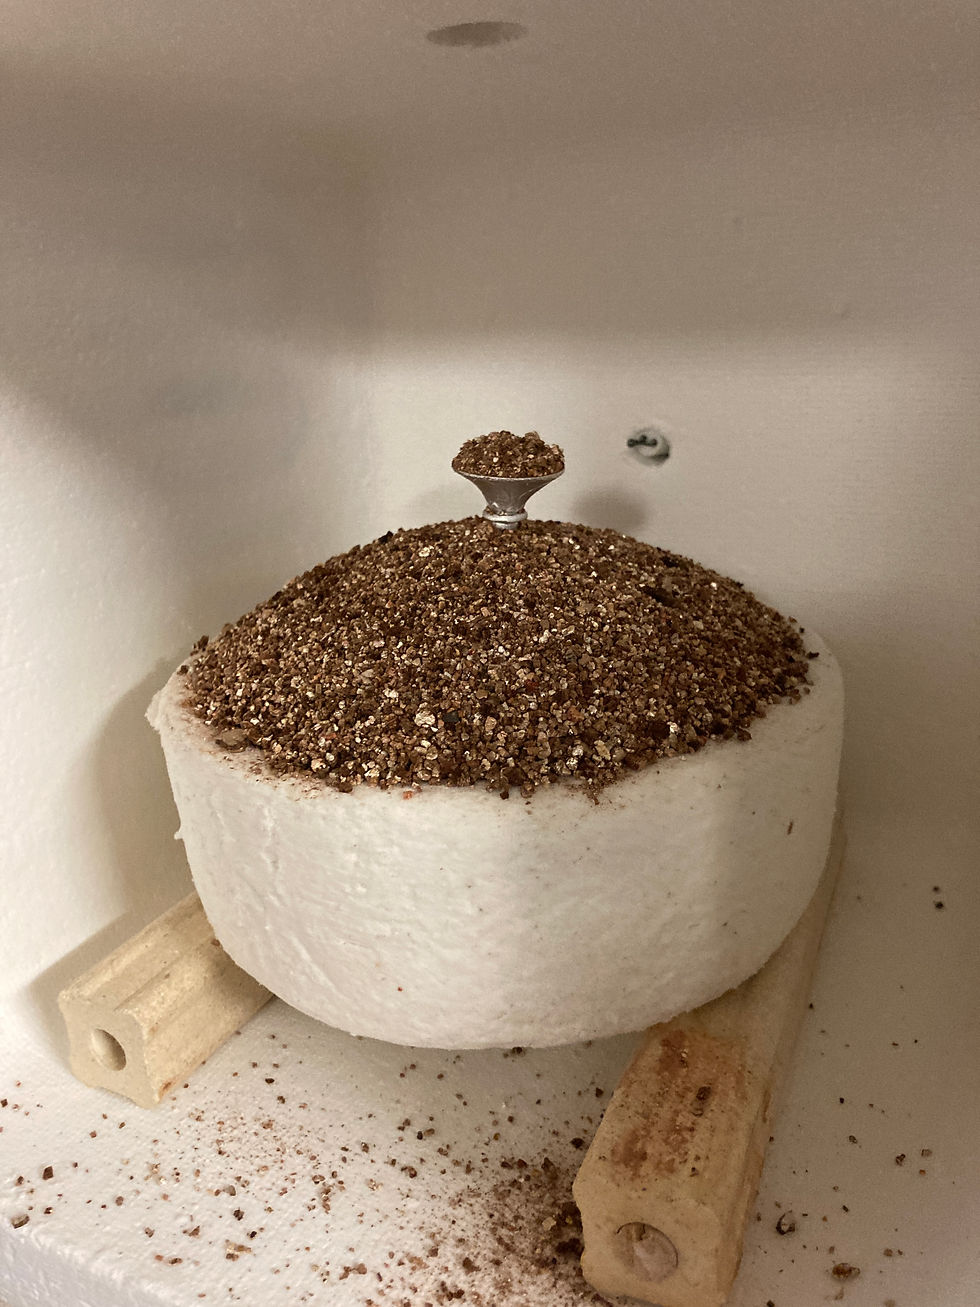
I put it in the kiln upside down in a bowl of vermiculite. My 19-year-old kiln decided NOW was the time to overshoot the temperature and overfire my piece. This led to 3 months of back and forth with the kiln people, and then I finally was forced to get a new one.
Some people call me tenacious; others call me stubborn, but no matter, I stuck with the project like a dog with an oversized bone trying to ram it into the small doorway of a doghouse. After so many hours, I wasn't going to surrender. (I really hate that word.)
Fix and Fire 1
It inherited little bumps all over the surface and a crack here and there. Needless to say, I was disgusted, but it wasn’t horrible, so I fixed it by first using a coarse rubber wheel and my hand-held rotary tool to remove the bumps.
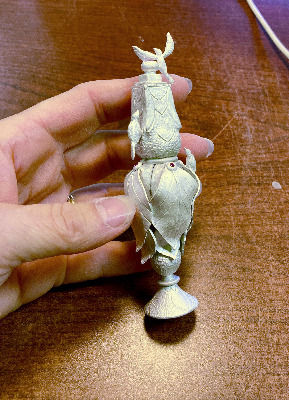
Then I used sandpaper to prepare areas of the metal to be repaired before I added lump clay with a bit of PasteMaker® in it to repair cracks and put it in my “other” kiln.
Don’t you know it, for the first time it too overfired! What are the chances???? I call myself the one in a million gal because if something goes wrong with the odds of one chance in a million, I’ll nail it like a gymnast nailing her landing.
Fix and Fire 2
This time it split the interior Metal Clay vessel, AND there was nasty distortion. Did I curse? You bet I did! No holding back this time!! As luck would have it, I had to walk away because the kiln needed fixing, and I ran out of alternative Kiln firing methods.
Fix and Fire 3
Now to fix the areas I couldn’t reach, the significant split in the vessel, and the distortion I could not alter even with the tiniest tools to maneuver into the crevices. I would need to use my handy metalsmith skills to do the next sequence of repairs. I padded adjacent areas with masking tape to avoid marring them before sawing apart the base from the vessel with a jeweler’s saw.

After it was apart, I used nylon pliers to straighten a small leaf at the bottom half of the construction. It was compressed, changing the curvature of the leaf, making it lean like the Leaning Tower of Pisa to one side.
Next, I used a softwood dowel against the piece and tapped it with a hammer on the outside curves to correct the angles. Finally, I used a large 1/8” head ball stylus inside the larger leaf to push from the inside out to perfect the elegant curves, as a curve with a flat spot would ruin the lines of the piece.
Again, I used lump clay with Pastemaker® to fill the gaps in the vessel and reconstruct and attach the two pieces. I work upside down because most of the weight is at the top. The narrow top made working in that fashion precarious, so I pushed the top into a wad of polymer clay attached to my jewelry bench to stabilize the piece. Until the wet silver clay dried, I held my breath. I nervously fired in the kiln. Now it is one again and fired!
Adding Texture to the Fired Metal
After all of the kiln firing, I noticed the core of the bottle did not have the pristinely smooth texture I originally had. I loved the contrast between it, the leaves, and the other modeled surfaces, but I knew I could never achieve the desired smoothly brushed finish I envisioned, so if you can’t beat ‘em, join ‘em. I decided to add a similar texture to the visible interior “triangular shapes” between the leaves as I did to the round portions of the bottle.
The difference now was the textured treatment was first added to the greenware, and this time it was applied to metal, so would it match? I think it did reasonably well since there was a patina added. The burs’ effect on the metal was more “sparkly without the patina.” I envision this surface treatment as a new find worth using on another piece, and I'll store it in my memory banks or better written down for future use.
The Big Design Challenge
The part driving me batty during the reconstruction phase was lining up all the points again. Design-wise points act like arrows saying “follow me this way,” so if they don’t line up, it looks like it is leaning even when the piece isn’t leaning. There are points everywhere between the pointed leaves, triangular design, and corners at the top. Argh!
I used a plumb to line up the points and a ruler to mark alignment with a sharpie on opposing sides of the perfume bottle. Then a hammer to make better alignment, a rotary tool, and a diamond drill bit to tweak points, curves, and angles into submission.
I’ve never shied away from a challenge, but come on; this one was a big project with lots of time and Silver invested in it. I don’t think anyone would blame me for walking away, but I didn't — a bit of stubborn persistence paid off.
Celebrating Student Nefertem Perfume Bottle
I'm so proud of my students who have taken the Nefertem Perfume Bottle Classes; I wanted to show some off. I also put the Nefertem Perfume Bottle Classes on the schedule for the Spring. Baring any kiln accelerations, yours could look as lovely as theirs, so I hope you will join me. From Left to right: Emma Gordon, Deborah Wenske Brooks, Loretta Hackman, Barbara Hance, and Ellen Levy.
Spring Jewelry Workshop Schedule
Live, Interactive Online Class for ALL Abilities
These small interactive, online group sessions provide expert learning and great connectivity with other artists, and now they are recorded!

Thursday, June 30 - July 28, 2022
1:00 pm - 2:00 pm Eastern
(5:00 Greenwich Mean, 12:00 PM Central, 11:00 AM Mountain, 10:00 AM Pacific)
(5) week group sessions • 60 min. Live & Interactive on Go to Meeting • Recorded
All levels of ability
___________________________________________________________

Elegant Meadow Pods 3 Spots
Wednesday, June 29 - July 27, 2022
6:00 PM to 7:00 PM, Eastern
(10:00 pm Greenwich, 5:00 pm Central, 4:00 pm Mountain, 3:00 pm Pacific)
(5) week group sessions • 60 min. Live & Interactive on Go to Meeting • Recorded
All levels of ability
___________________________________________________________
Thursday, July 7 - August 11, 2022
6:00 PM to 7:00 PM, Eastern
(10:00 pm Greenwich, 5:00 pm Central, 4:00 pm Mountain, 3:00 pm Pacific)
(6) week group sessions • 60 min. Live & Interactive on Go to Meeting • Recorded All levels of ability
___________________________________________________________

Monday, July 11 - August 15, 2022 (Skip July 18)
6:00 PM to 7:00 PM, Eastern
(10:00 pm Greenwich, 5:00 pm Central, 4:00 pm Mountain, 3:00 pm Pacific)
(5) week group sessions • 60 min. Live & Interactive on Go to Meeting • Recorded
All levels of ability
___________________________________________________________

Tuesday, August 2 - October 25 (skipping August. 23 & 30, October 18)
1:00 pm - 2:00 pm Eastern
(5:00 Greenwich Mean, 12:00 PM Central, 11:00 AM Mountain, 10:00 AM Pacific) (10) week group sessions • 90 min. Live & Interactive on Go to Meeting • Recorded
All levels of ability
___________________________________________________________
Wednesday, August 3 - 17 & September 7, 2022
6:00 PM to 7:00 PM, Eastern
(11:00 pm Greenwich Mean, 5:00 pm Central, 4:00 pm Mountain, 3:00 pm Pacific)
(4) week group sessions • 60 min. Live & Interactive on Go to Meeting • Recorded
All levels of ability

Looking for the Beauty, Depth, and Flash of Opals?
Christopher's artisan cut Cultured Opals will ignite your imagination. The GIA recognizes these Cultured Opals as true synthetic opals having essentially the same chemical, physical, and optical properties as natural opals. Chris likes to work with them because they are sustainable, not mined with forced labor or criminal funding, and are renewable without damaging the environment. This week's auction on Friday from 10 AM - 10 PM Eastern will feature one and two-sided cabs, and shards on Christopher Gage's Facebook Page


Comments